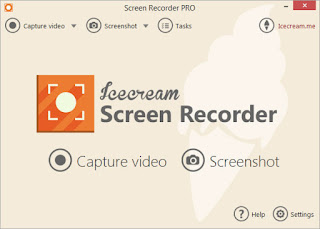
Capture your screen with Icecream Recorder
 The easy way to capture any part of your PC's screen — even video — S with our guide to this easy-to-use app
While you can easily capture a still image of your entire Windows 10 desktop by using the Print Screen command on your PC, Icecream Recorder (www.icecreamapps.com) gives you a whole lot more control. You can use it to capture specific parts of a screen and even record video-streams from the web. It's also useful for when you want to show someone how to do something - like in a tutorial such as this. You can get the app to record your every move, along with a voice over, which you can then save as a video that you can share.
Although Icecream Recorder is free, to get the best out of it we suggest the paid-for Pro version. It allows you to do more, including capturing grabs in a variety of file formats, making it easier for you to share them as widely as possible. For now, we'll get going with the free version!
Set your preferences
The first thing you should do when you open Icecream Recorder is decide where you want your screenshots and videos to be saved. Head to 'Settings > Save To' and choose the default folders to use. This could be your 'Pictures > Saved Pictures' folder or to the cloud on OneDrive. Select 'Customise output file names' if you want to name each screen capture.
Choose your screenshot format
Icecream Recorder enables you save screenshots in different formats, so under 'Settings > System; choose which one you'd like to use: PNG or JPEG.The 'System' tab also enables you to choose whether to automatically open the apps when you log in, check for updates, show notifications and more. You can customise screen grab shortcuts under the 'Hotkeys' tab on the right.
Choose your video format
Head to 'Settings > Video' and select the video format drop-down to choose which format you want to record in. If you're using the free version, you'll be limited to the default, which is WebM (VP8). You can also set the video-recording quality and add a countdown timer so you'll be ready for when recording starts.
Choose your audio format
Before you begin capturing screenshots, choose your audio options. These give you the chance to capture sound from what you're recording on screen, as well as from your microphone. You can also adjust audio-recording levels, with further sound tweaks available when you select 'Open Mixer'. You can also choose how sounds are played back too.
Pick a screenshot style
Icecream Recorder gives you lots of flexibility when it comes to capturing stuff on screen. You can record events Full screen, choose a Custom area, recapture the last area you selected or use Area auto detection. If you choose this last option, the app tries try to identify different screen elements, which you can mouse over then select.
Create a custom screenshot
To choose a specific area of a screen choose 'Custom', then use your mouse to click and drag to draw the capture area. You can adjust the area using the grab handles or set its dimensions in 'Take Screenshot'. When you're set, tap'Screenshot You'll be prompted to name your screenshot and save it to your default folder. The process for recording video is the same.
Annotate your screen
To annotate screenshots, select 'Draw' from the 'Take Screenshot' window. You can add shapes, change their colour and border weight as well as add text. if you're unhappy with where you've placed a shape or want to resize it, you can do so by selecting the cursor tool in the same window. You can also add multiple annotations in steps.
Share your screens
I Anything you capture with Icecream Recorder is logged
 under 'Task' in the main window. Here you'll find details for each one including its file size and resolution. Selecting a task will open it for you to view, with other options available on the right-hand side. Selecting 'More' enables you to copy the screenshot to the clipboard. To share a screenshot, open it, then choose 'Share.
Capture your screen with Icecream Recorder
 Reviewed by Cars Explorers
on
15:30:00
Rating:
 Reviewed by Cars Explorers
on
15:30:00
Rating:


No comments: